Windows Server 2012 server can be promoted to ADDS Domain
Controller in 2 ways: GUI and PowerShell. I’ll show to how to promote first
Domain Controller in a new Forest.
Obviously we need to change the server name as desired and assign a fixed IP address. For my lab here, I’m going to create a new forest domain named corp.local and DC CORPDC. Also 172.16.1.1 fixed IP is assigned to the DC.
Let’s start:
Log on to the server and open Server Manager


We will also install the DNS service role on the DC, so select DNS Server, on the Select server roles page. It too, in turns, it will open a pop-up window listing the features; those are also need by the DNS Server role. Confirm that, Include Management Tools (if applicable) is selected. Click Add Features and then click Next.

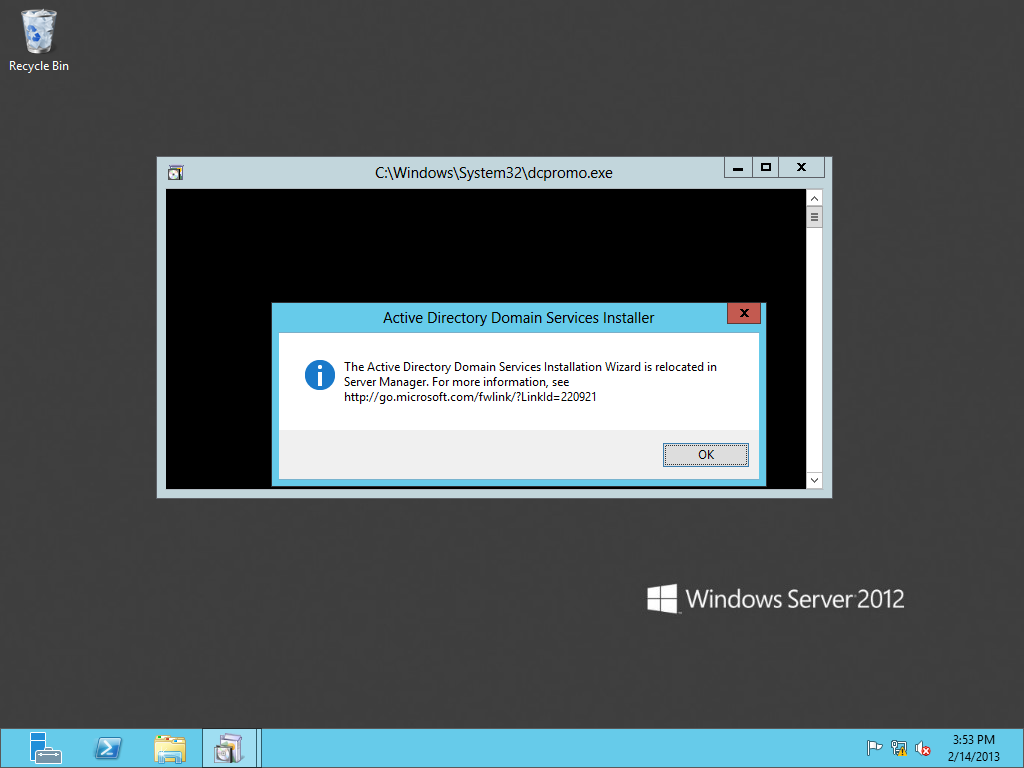
Previous, primary tool for domain controller promotion and
demotion, DCPROMO is no longer applicable;
in fact if we try to execute DCPROMO, it will refers us to Server Manager. Server Manager is now the primary GUI tool
for DC promotion and demotion.

Obviously we need to change the server name as desired and assign a fixed IP address. For my lab here, I’m going to create a new forest domain named corp.local and DC CORPDC. Also 172.16.1.1 fixed IP is assigned to the DC.
There are 2 high level steps to install a domain controller:
1. Add Active Directory Services, roles and features to the desired server. In this step, all the binary files are copied and installed on the server.
2. Promote the server to domain controller.
1. Add Active Directory Services, roles and features to the desired server. In this step, all the binary files are copied and installed on the server.
2. Promote the server to domain controller.
Let’s start:
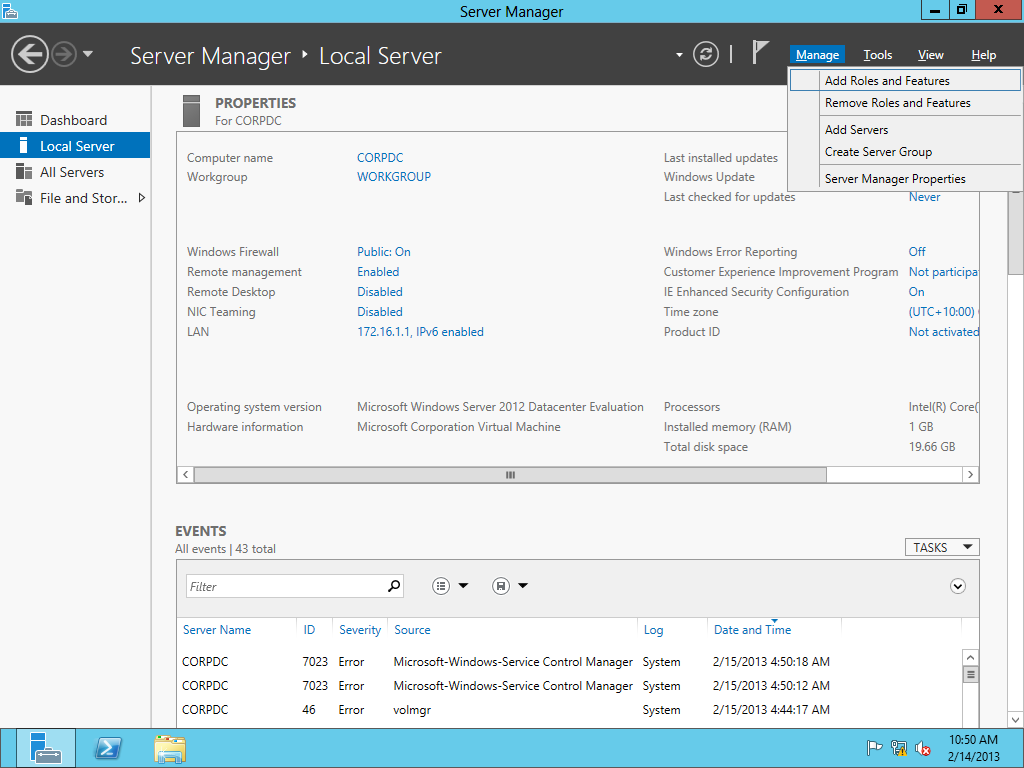
Log on to the server and open Server Manager
Click on the Manage
menu and Select Add Roles and Features

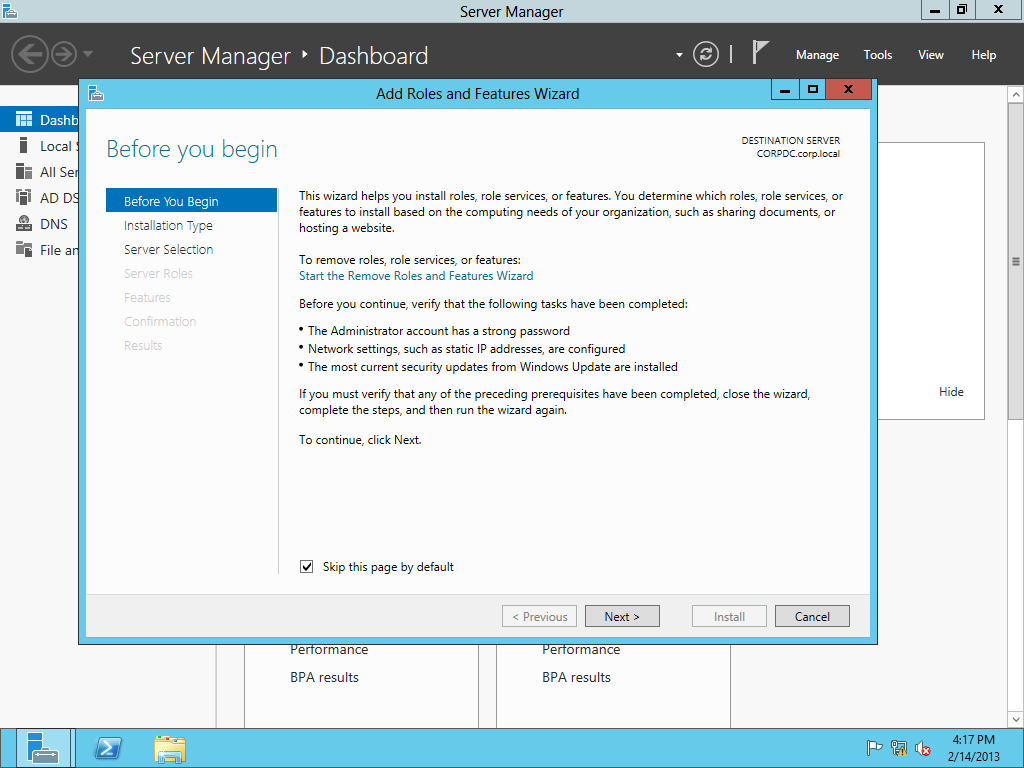
Before you began, page will give some basic information to
set strong password, static IP address and confirm the Windows update, click
Next.
For all Role and Features, installations, including AD DS,
select Role-based or feature-based installation. Click Next.

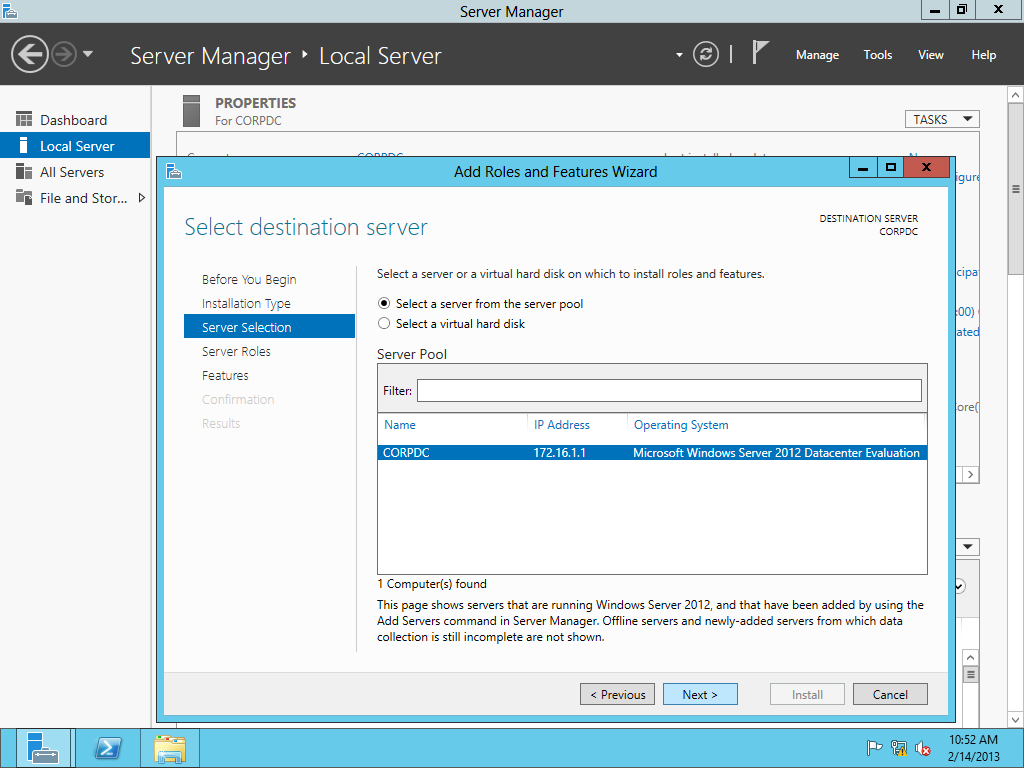
In the latest Server Manager, it’s possible to install role
or features any remote server managed by Server Manager.
Select the desired server from the server pool, which is
going to be promoted to DC and click Next.

On the Select server roles page, click Active Directory Domain Services. In turns, it will open a pop-up
window listing the features; those are also need by the Active Directory Domain
Services role. Confirm that, Include Management Tools (if applicable) is
selected. Click Add Features

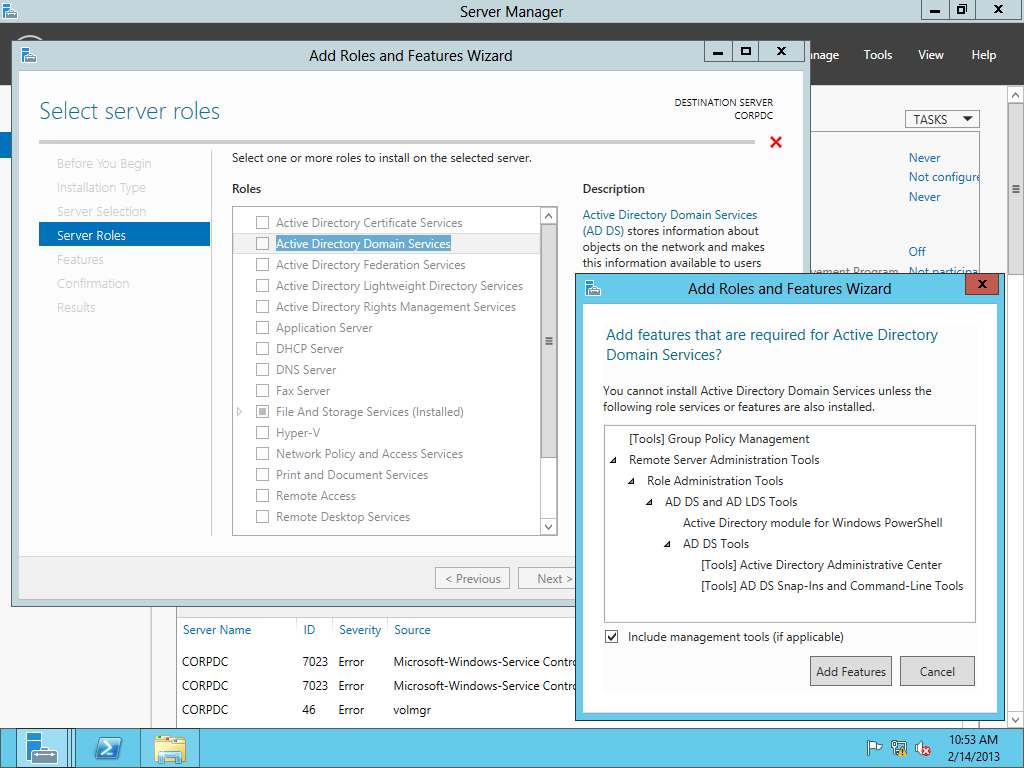
We will also install the DNS service role on the DC, so select DNS Server, on the Select server roles page. It too, in turns, it will open a pop-up window listing the features; those are also need by the DNS Server role. Confirm that, Include Management Tools (if applicable) is selected. Click Add Features and then click Next.

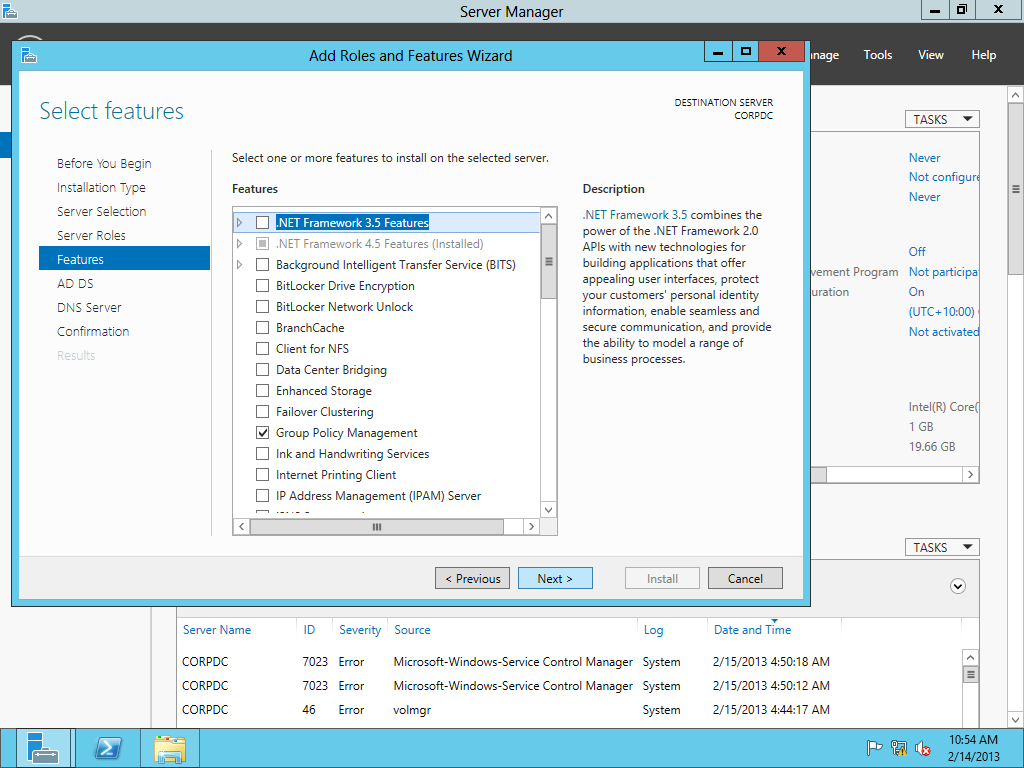
On the Select features page, Group Policy Management is
already selected. Click Next.

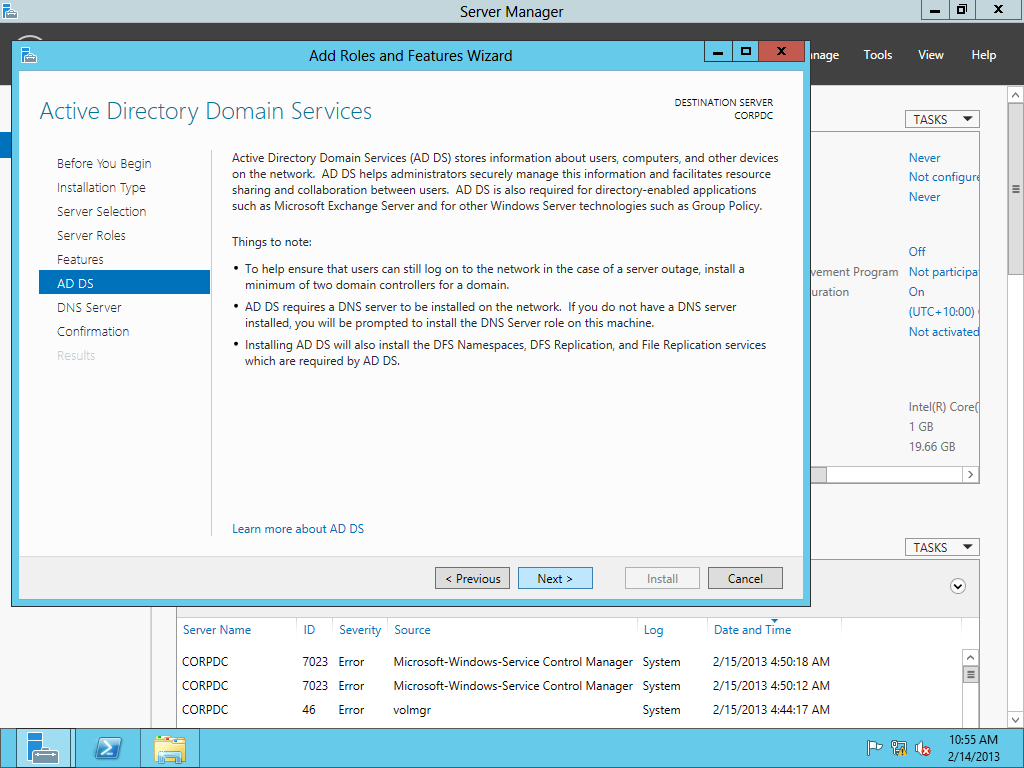
On the “Active
Directory Domain Services” page, it gives basic information about AD DS. Click Next.

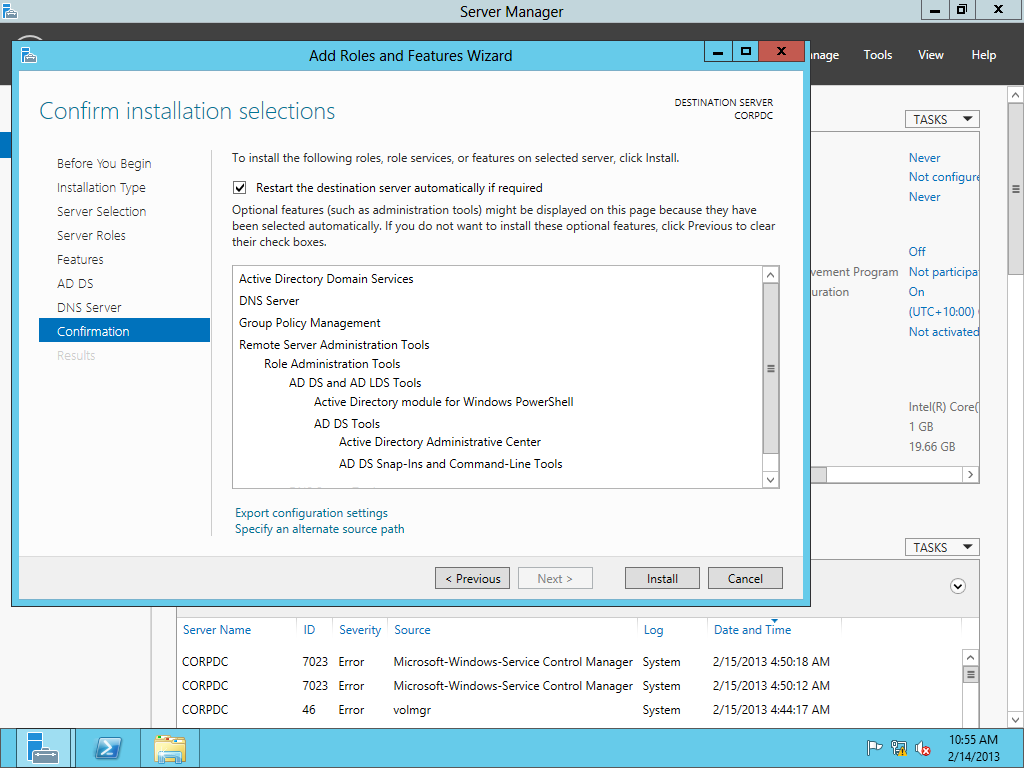
On the “Confirmation”
Page, we need to confirm this to continue with this configuration. It provides
us an option to export the configuration settings and also if we want
the server to be restarted automatically as required. It is always good idea to
have a proper reboot circle after any role or feature installation. Select Restart the destination server
automatically if required, if possible to do so in production. Click Install.

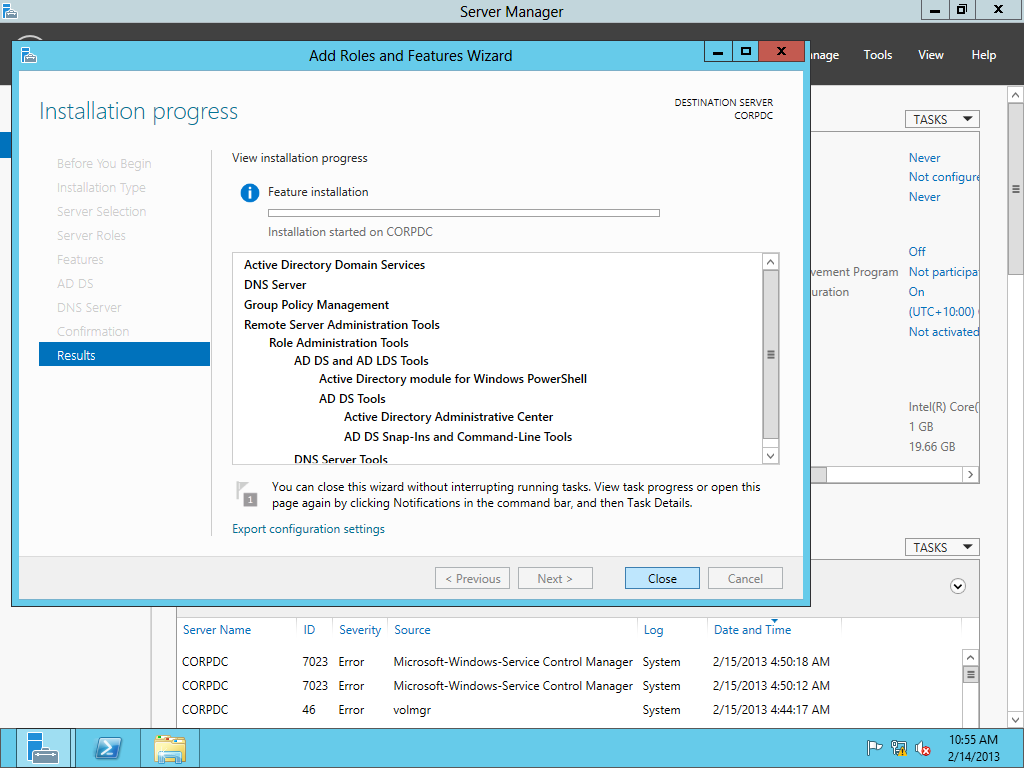
It will start installing the required binaries for AD DS.
Once the role and feature installation completed, it will automatically close
the wizard.

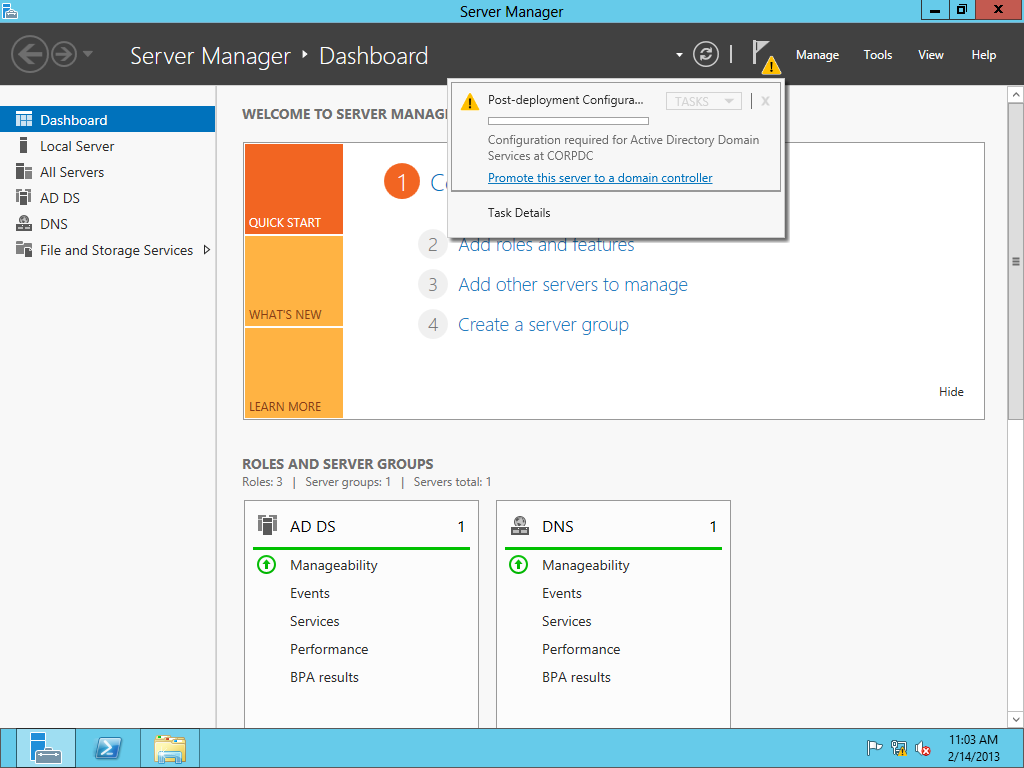
Now, it’s time to move to the next step, promote the server
to domain controller.
From the Dashboard, click on the Notification flag. A warning for Post-deployment configuration task will appear. Click Promote this server to domain controller.

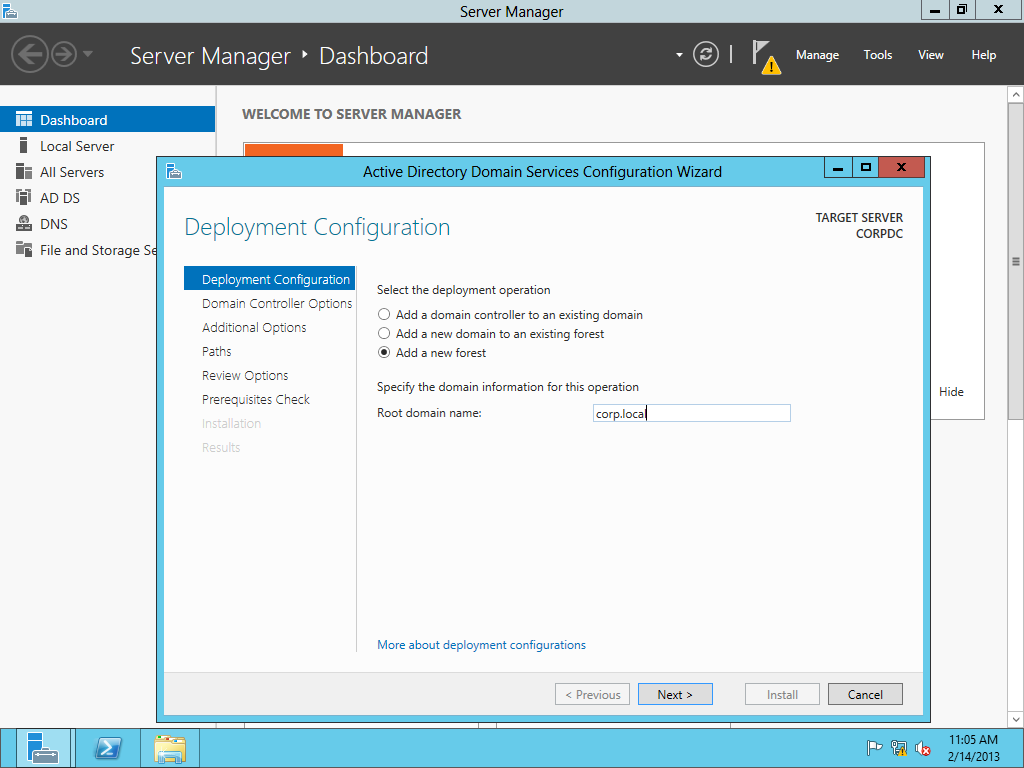
Since we are promoting first DC is new forest, click Add a new forest and enter root domain
name. I named my new forest root domain as corp.local. Click Next.

As in my lab, I will have all DC running on Windows Server
2012, I’ve selected Windows Server 2012 as both Forest and Domain functional
level to leverage all the latest features provided by Windows Server 2012 AD
DS. Select both Forest and domain function level based on your scenario. Refer
to this TechNet article for functional levels: http://technet.microsoft.com/en-us/library/understanding-active-directory-functional-levels(v=ws.10).aspx.
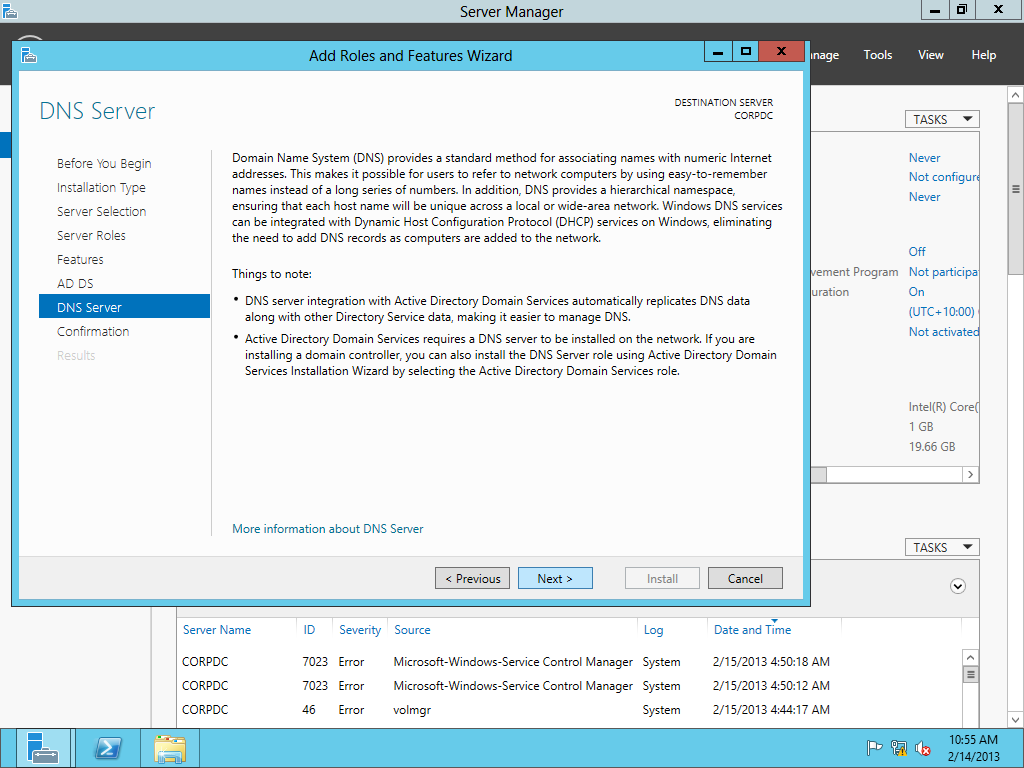
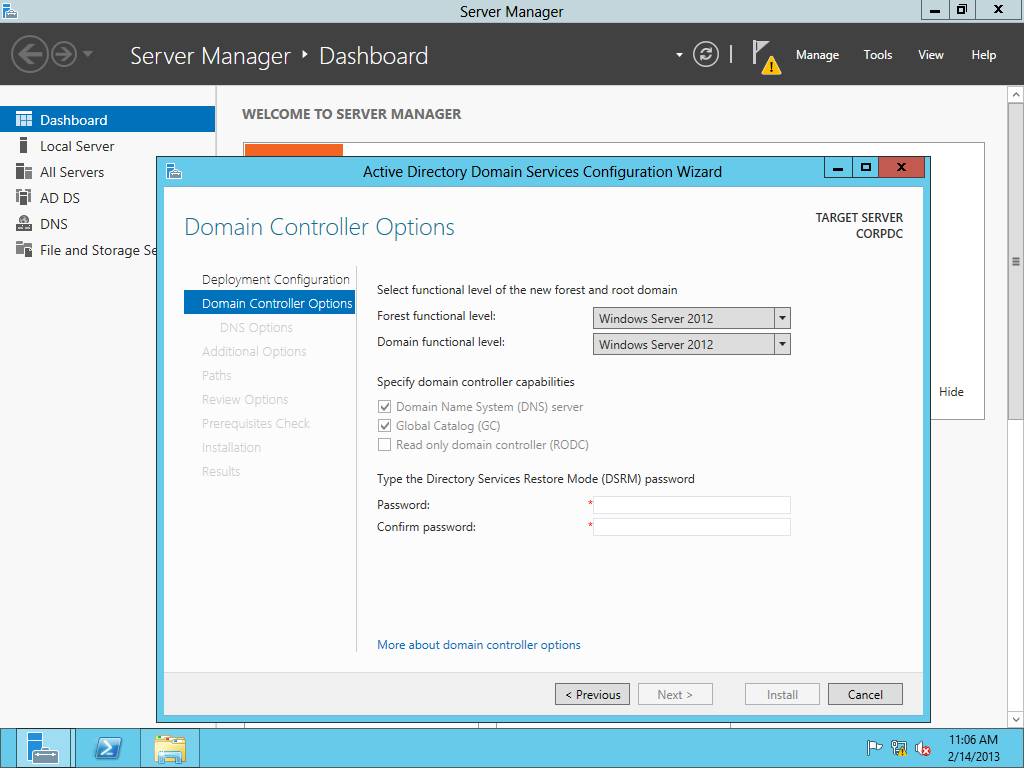
As we have also installed the DNS server role on this server, so DNS server is
select as this DC’s capabilities and greyed out. Since this server is going to
be first DC in the forest and domain, it will automatically become the Global
Catalog (GC) and we can’t change this setting. For Read only domain controller
(RODC), we can’t configure first DC as RODC. Enter and confirm Directory
services Restore Mode (DSRM) password and click Next.

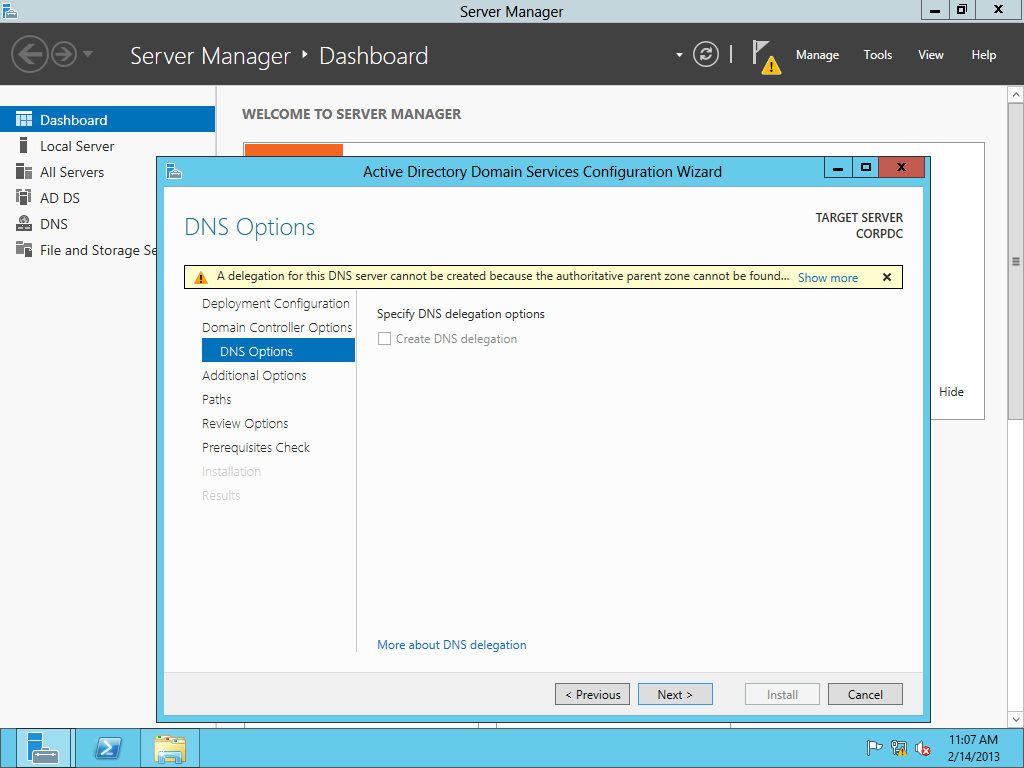
I named my domain as corp.local and there is no way or
need to delegate corp domain in local root domain DNS, so we can safely
ignore DNS delegation warning on DNS option page. Click Next.

Specify the database, log and SYSVOL location on the Path
page. Refer to Microsoft recommendation for these files and database placement,
for this you can click more about Active Directory path at the bottom of the
page. As a basic rule, don’t place database and log file on the same hard drive
spindles. Click Next.


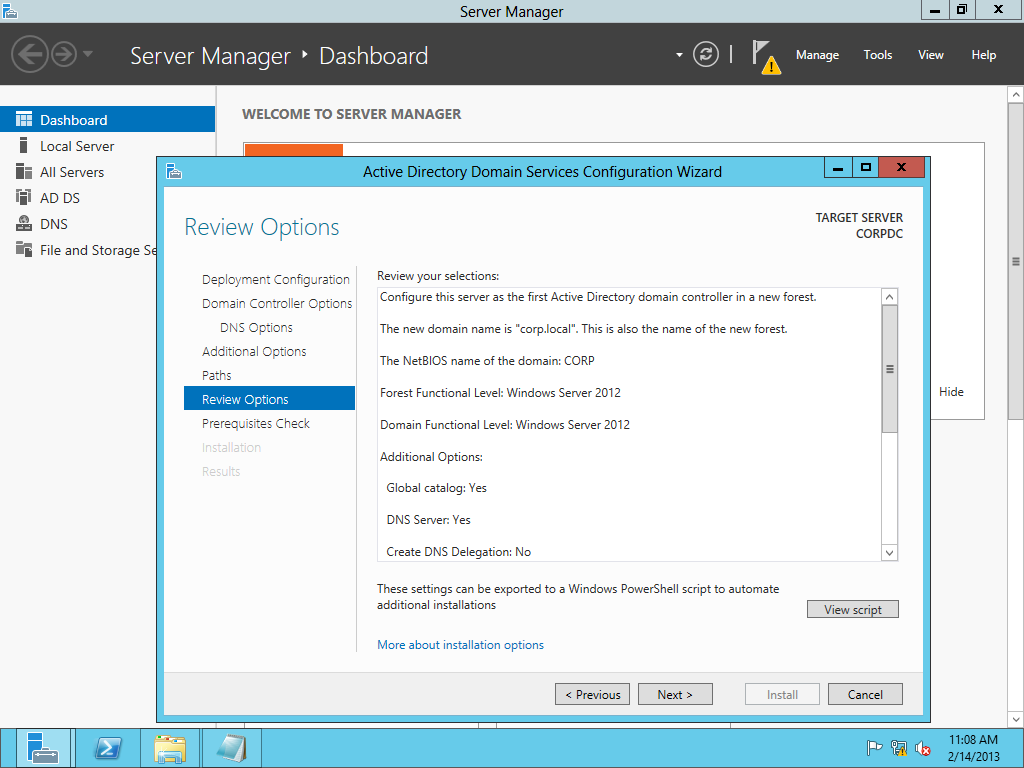
Review all the selection. One of the cool features of this
GUI based DC promotion, it generates a PowerShell single lined script based our
selection. To view the script, click View
Script. This is very handy if we decide to DC promotional steps in scripted
installation, from PowerShell etc. Click Next.


Before the actual install of AD, all prerequisites are
checked. If all prerequisite checks are passed successfully then click Install.

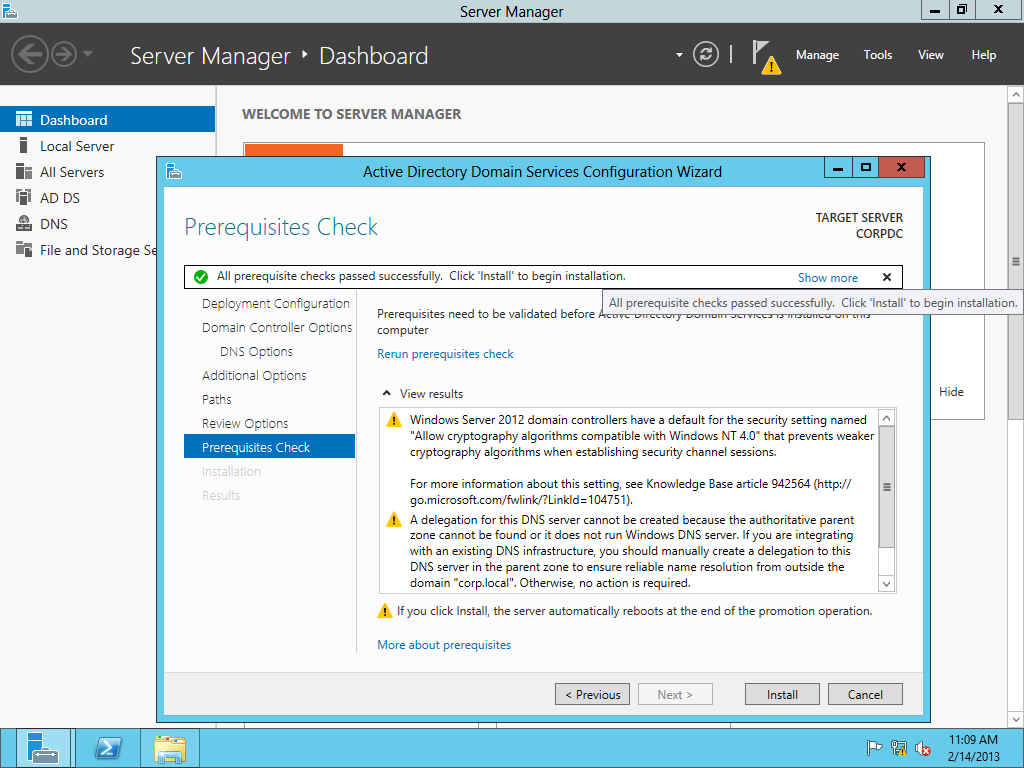
It will start domain controller promotional processes

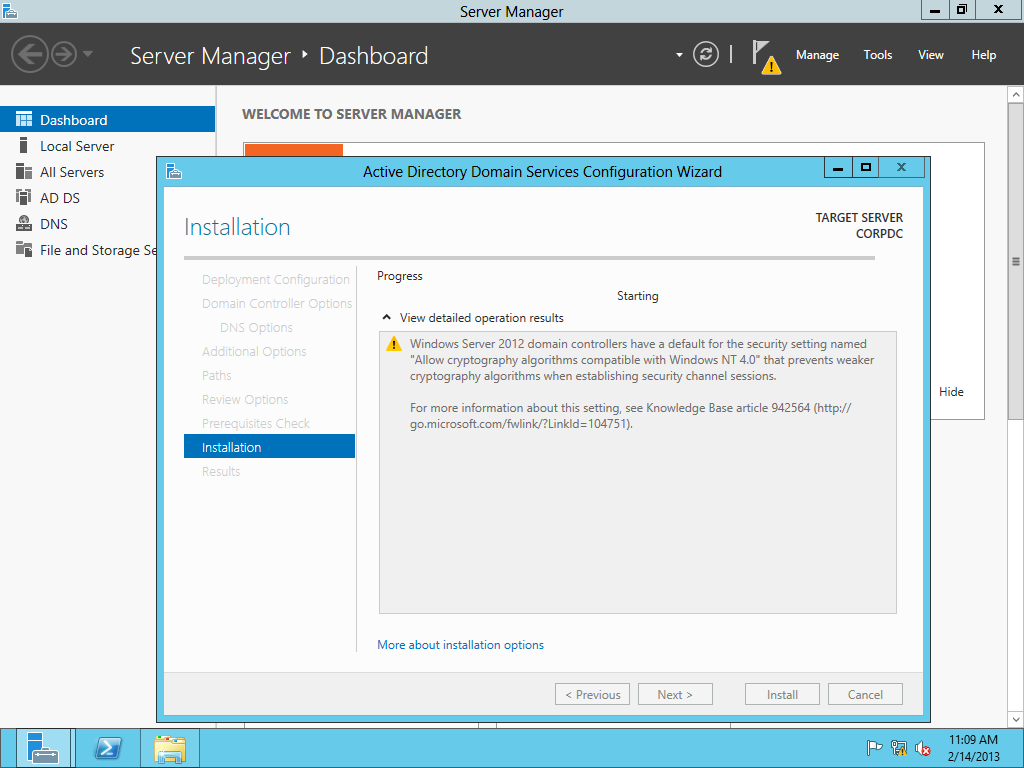
On successfully configured the Domain Controller, it
will display a message on the Result page. Click Close. The server will reboot afterward


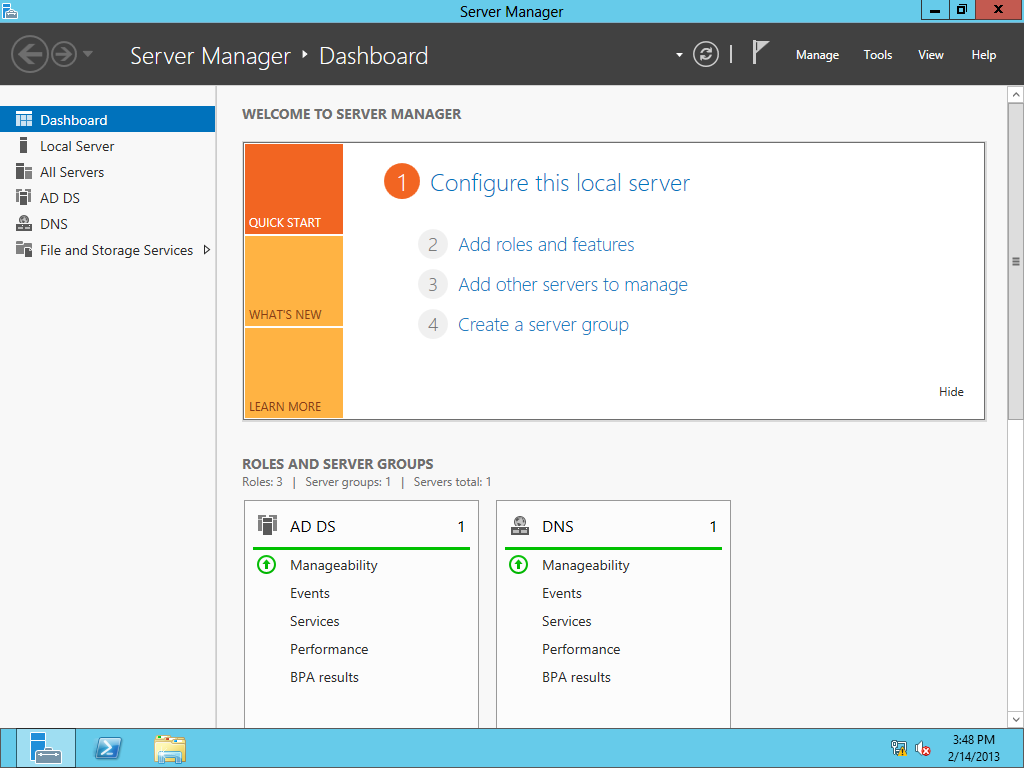
Once restarted, log on to the server and open Server Manager, confirm AD DS and DNS
are appeared as available and Role and services on the left side and installed
server is listed under them.

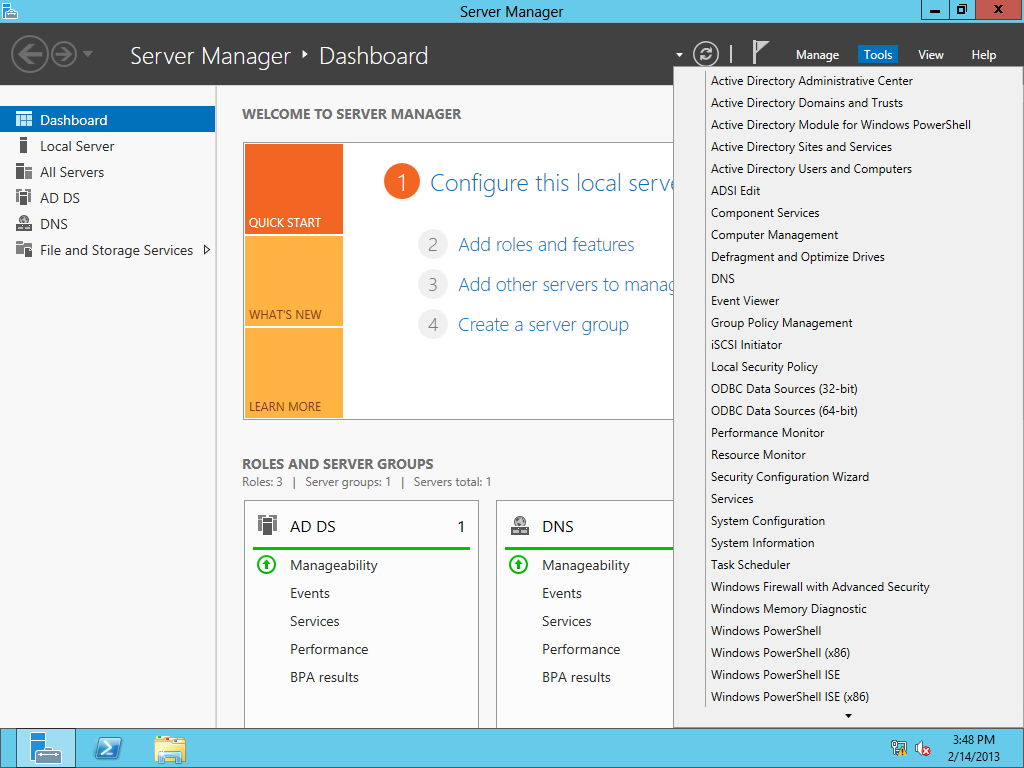
Also Click the Tools
and confirmed following have been installed:
Active Directory Administrative Center
Active Directory Domains and Trusts
Active Directory Module for Windows PowerShell
Active Directory Sites and Services
Active Directory Users and Computers
ADSI Edit
DNS
Group Policy Management

These will confirm the successful completion of ADDS Domain
Controller installation.
Optionally, we can also run Active Directory Services Best
Practices Analyzer (BPA) to confirm the configuration. To run BPA, on the
Server Manager, on the left side, select AD DS, once selected, on the right
side, scroll down until you find Best
Practices Analyzer. Click Task
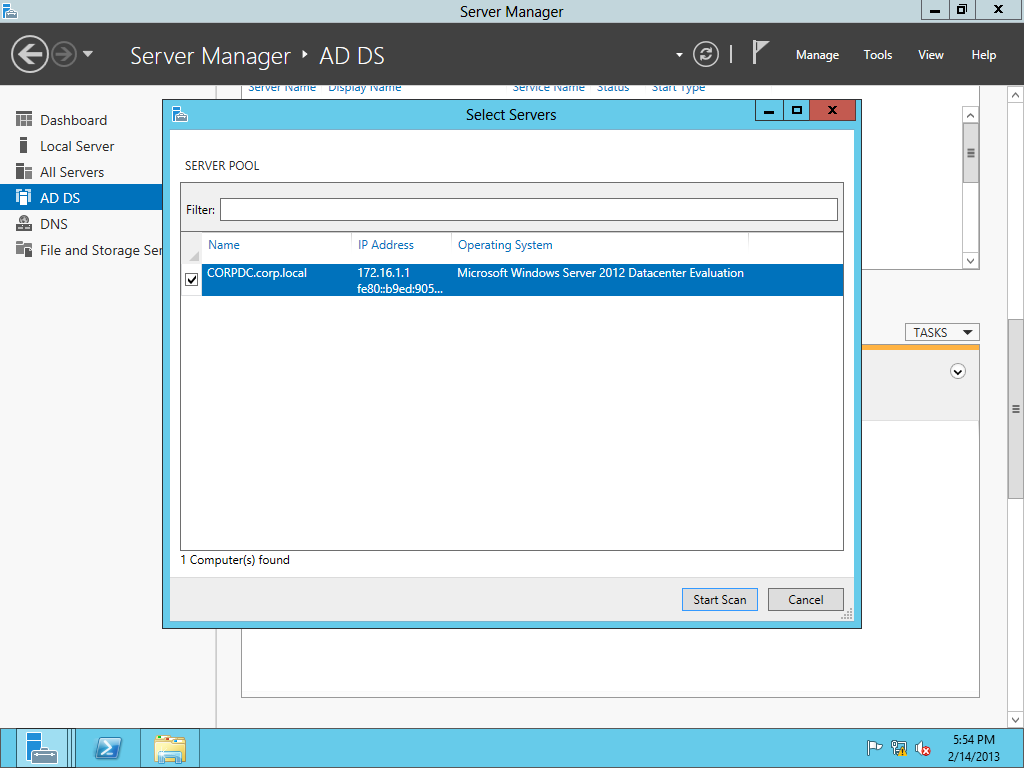
under BPA section and click Start BPA
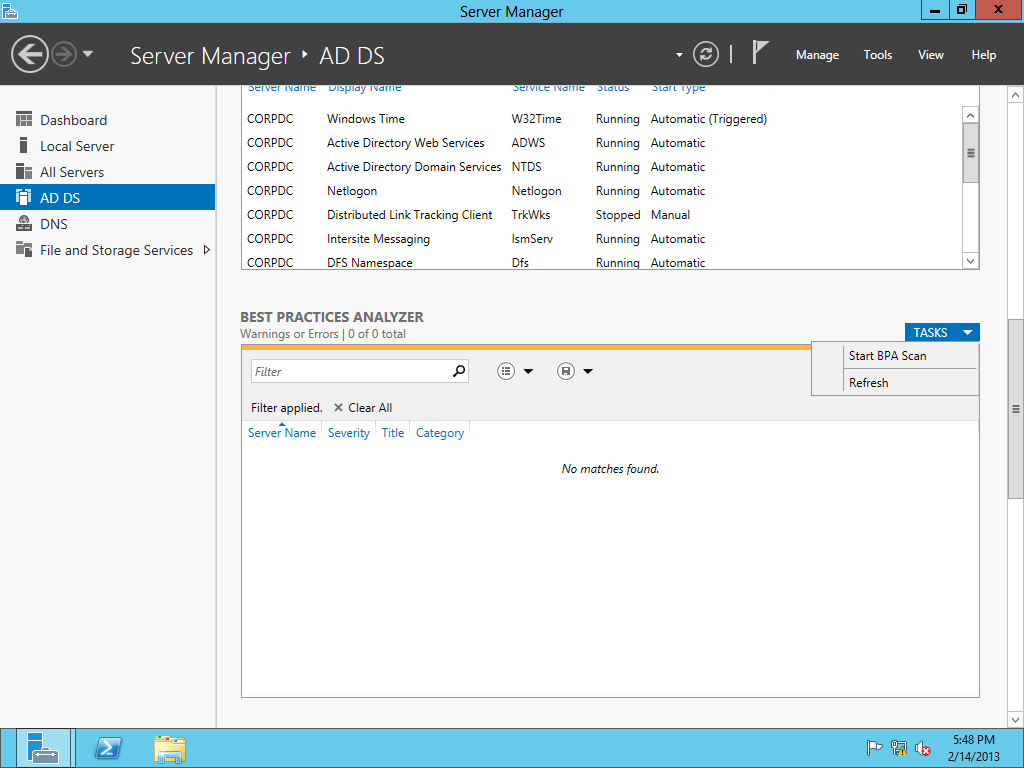
Select the desired server and click Start Scan

Once BPA finished running, review and rectify any warning
and error that any have appeared


No comments:
Post a Comment